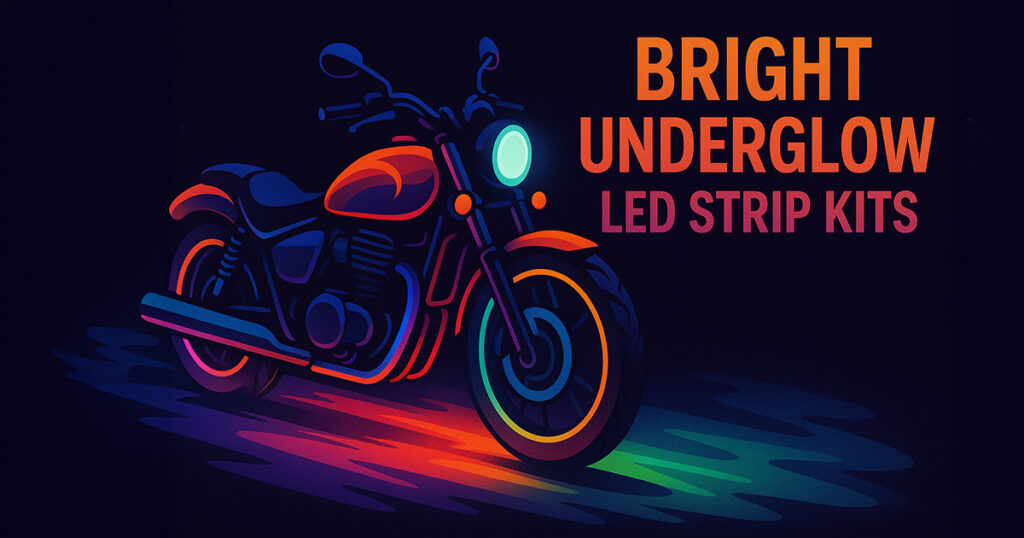
Thinking about adding underglow to your motorcycle or car?
You’ve probably noticed prices ranging from $30 to $300+ for what looks like the same product.
Here’s what actually makes the difference.
Before you click “buy” on that tempting deal, understand this: brightness isn’t about watts or fancy marketing terms.
- It’s about 10 specific factors that determine whether your underglow will turn heads or disappoint.
- This guide breaks down everything you need to know before purchasing.
- You’ll learn exactly what to look for, what questions to ask sellers, and which specs actually matter for real street visibility.
Let’s start with the foundation of any bright underglow system: the LED chips themselves…
LED Chip Type and Size
You’ve seen those eye-catching underglow kits lighting up the streets. But what separates a kit that barely glows from one that turns heads?
It starts with the LED chips themselves.
SMD Numbers (Simpler Than You Think)
Those cryptic numbers like 3528, 5050, or 5730 aren’t random.
They tell you the chip’s physical size in millimeters.
- A 5050 chip measures 5.0mm × 5.0mm. Simple as that.
Here’s what matters: bigger chips pack more light-emitting components inside.
- Think of it like engines – a V8 produces more power than a 4-cylinder.
- Similarly, a 5050 chip contains three light-emitting diodes, while a 3528 has just one.
Real-World Brightness Differences
In practical terms:
- 3528 chips: Budget-friendly but dim. Fine for accent lighting, not great for true underglow impact.
- 5050 chips: The sweet spot. Three times brighter than 3528s at the same power. Most quality kits use these.
- 5730 chips: Premium option. Even brighter but cost more and run hotter.
What This Means for Your Ride
Picture this:
You’re cruising through downtown at night.
- With 3528 chips, your underglow might disappear under streetlights.
- But 5050s? They’ll create that vibrant pool of light that follows your vehicle, visible even in well-lit areas.
The bottom line:
Don’t get caught up in marketing hype.
- Check the chip type first.
- For genuine street presence, 5050 is your minimum standard.
LED Density and Power Draw
Now that you’ve chosen quality chips, how many do you actually need?
This is where LED density comes into play – and it’s a game-changer for brightness.
Decoding LED Density Numbers
LED strips come with different densities:
- 30 LEDs per meter: Noticeable gaps between lights. Creates a dotted effect.
- 60 LEDs per meter: Smooth, continuous glow. The industry standard.
- 120 LEDs per meter: Ultra-bright, seamless coverage. Premium choice.
- 144 LEDs per meter: Maximum intensity. Often overkill for most riders.
Think of it like pixels on a screen.
- More pixels mean sharper images.
- More LEDs mean smoother, brighter underglow.
The Power Reality Check
Here’s what many beginning buyers may not know:
- Doubling your LEDs doubles your power needs.
- A 60-LED strip pulls about 14 watts per meter.
- Jump to 120 LEDs? You’re looking at 28 watts.
This matters because:
- Your bike’s electrical system has limits
- More power means more heat
- Higher drain affects battery life
Real-World Performance
For most riders, 60-LED density with 5050 chips hits the sweet spot.
You’ll get 700-1000 lumens per meter – bright enough to stand out at car meets and cruise nights.
Want to see the difference?
A 30-LED strip looks like Christmas lights under your ride.
But 60-LED density creates that smooth, professional glow you see on show bikes.
Making the Smart Choice
Consider your riding style:
- Casual cruising: 60-LED density works perfectly
- Show competition: Spring for 120-LED strips
- Daily commuting: 60-LED balances visibility and battery drain
Remember:
Density without proper power is useless. A 120-LED strip running on weak wiring performs worse than a properly powered 60-LED setup.
Lumen Specification & “Real-World” Brightness
You’ve probably noticed LED light descriptions throwing around numbers like “ultra-bright 5000 lumens!”
But what do these numbers actually mean for your ride?
Lumens vs. Watts: The Truth
Forget watts – they only tell you power consumption.
Lumens measure actual light output.
It’s like judging a speaker by its volume, not its power draw.
Here’s your quick reference:
- Under 450 lumens per foot: Barely visible at night
- 450-600 lumens per foot: Good visibility in most conditions
- 600-800 lumens per foot: Bright enough for any street
- Over 800 lumens per foot: Show-stopping brightness
The Street Reality
Those lab measurements?
They’re taken in perfect conditions.
Your underglow faces real-world challenges:
- Street lights washing out the effect
- Road grime dimming the strips
- Ambient light from other vehicles
- Weather conditions affecting visibility
A kit claiming 1500 lumens per meter sounds impressive.
But mounted under your bike, bouncing light off asphalt?
You might see half that brightness.
What Actually Matters
Check customer photos taken at night.
Lab specs can lie, but real-world photos don’t.
Look for kits that glow visibly even under gas station lights.
Setting Realistic Expectations
For motorcycles:
- Aim for 450+ lumens per foot minimum.
- This ensures visibility even on well-lit city streets.
For cars:
- You need more coverage.
- Target 600+ lumens per foot to create that dramatic ground effect.
Remember:
More isn’t always better.
Blinding brightness can distract other drivers and attract unwanted police attention.
Power Delivery, Voltage Drop, and Wiring
You bought premium LEDs with impressive specs.
But why do they dim toward the ends?
Welcome to the world of voltage drop – the silent brightness thief.
The Voltage Drop Reality
Picture water flowing through a garden hose.
Use a thin hose for a long distance?
- Water pressure drops.
- Same thing happens with electricity through wires.
Here’s what happens:
- Your battery outputs 12V
- Thin wires resist current flow
- By the strip’s end, you might have 10V
- LEDs running on 10V look half as bright
It’s frustrating. You paid for brightness but get a fading glow.
Wire Gauge Makes or Breaks Your Kit
The secret? Wire thickness (measured in AWG):
- AWG 28: Thin hobby wire. Visible dimming after 6 feet.
- AWG 24: Good quality. Handles most motorcycle installs.
- AWG 22: Premium choice. Minimal voltage drop. Best for car runs.
Quality kits include AWG 24 minimum.
If a seller won’t specify wire gauge, walk away.
Smart Installation Tricks
Beat voltage drop with these pro moves:
- Parallel wiring: Run separate wires to each strip section
- Direct battery connection: Skip the auxiliary circuits
- Quality connectors: Poor connections waste voltage
Wiring seems boring compared to choosing colors.
But it determines whether your kit looks brighter or darker.
Waterproofing & Optical Losses
Rain, road spray, and pressure washing – your underglow faces it all.
But here’s the catch: the very protection keeping water out can steal your brightness.
IP Ratings Decoded
Those IP65, IP67, IP68 ratings actually mean something:
- IP65: Splash resistant. Fine for cars, risky for bikes.
- IP67: Submersible briefly. The minimum for motorcycles.
- IP68: Fully waterproof. Survives deep puddles and pressure washing.
But waterproofing comes with a hidden cost.
The Brightness Trade-Off
Every protective layer blocks some light:
- Thin silicone coating: Loses 5-10% brightness
- Thick silicone sleeve: Loses 15-25% brightness
- Heavy epoxy coating: Loses up to 30% brightness
- Cloudy or yellowed protection: Loses 40%+ brightness
Imagine wearing sunglasses at night.
That’s what poor waterproofing does to your LEDs.
Choosing Smart Protection
Look for these features:
- Clear optical-grade silicone: Maximum light transmission
- UV-resistant materials: Prevents yellowing over time
- Factory-sealed ends: No DIY resealing needed
- Flexible design: Resists cracking from vibration
Avoid kits requiring you to reseal cut ends.
Amateur silicone work creates cloudy spots that kill brightness.
Real-World Durability Test
Quality waterproofing survives:
- Direct pressure washing
- Winter road salt
- Summer heat cycles
- Constant vibration
The Bottom Line
Don’t chase IP68 if it means thick, cloudy protection.
- A well-made IP67 strip with clear silicone outshines a heavily coated IP68 every time.
- Your underglow should light up wet pavement, not struggle through its own protective jacket.
Thermal Management
Ever notice how your underglow starts bright but dims after 20 minutes?
It’s common for heat to do its damage.
Unlike rigid LED bars with metal heatsinks, flexible strips fight a tougher battle.
The Hidden Heat Problem
LEDs convert about 80% of power into light.
Sounds efficient, right?
But that remaining 20% becomes heat.
Without proper management, your strips literally cook themselves dimmer.
Here’s what happens:
- LEDs heat up within minutes
- Output drops 10-20% as temperature rises
- Colors shift (white turns yellowish)
- Lifespan shortens dramatically
Quality Shows in the Details
Since strips can’t use traditional heatsinks, everything depends on internal construction:
Premium strips use:
- Thick copper PCB layers for heat spreading
- Gold bonding wires (superior conductivity)
- Quality solder joints
- Efficient power distribution
Budget strips cut corners with:
- Thin PCB material
- Aluminum or copper-alloy wires
- Poor solder quality
- Uneven power distribution
The difference?
Premium strips run 10°C cooler under identical conditions.
Real-World Impact
In controlled tests, quality strips maintain brightness all night.
Cheap ones? They’ll lose a significant brightness within an hour.
Picture this:
You arrive at a meet with blazing underglow.
An hour later, you’re wondering why your kit looks dim compared to others.
That’s thermal failure in action.
Maximizing Strip Life
Help your LEDs stay cool:
- Run at 80% maximum brightness
- Ensure airflow around strips
- Avoid enclosing them completely
- Consider pulsing effects over constant-on
The Temperature Test
Quality check:
- Run your strips at full brightness for 30 minutes.
- Touch them (carefully).
- Warm is normal.
- Too hot to hold? That’s a problem.
Remember:
- Every 10°C reduction doubles LED lifespan.
- Choose quality construction now or replace dim strips later.
Chip Quality and Bonding Wires
Two identical-looking LED strips.
Same chip type, same density.
Yet one outshines the other.
The secret?
- It’s all in the microscopic details you can’t see.
The Bonding Wire
Inside each LED, tiny wires connect the chip to power.
These hair-thin conductors make a massive difference:
Gold bonding wires:
- Superior electrical conductivity
- Minimal resistance means more light
- Stay reliable for years
- Handle heat without degrading
Copper or aluminum wires:
- Higher resistance steals brightness
- Degrade faster under heat
- Create inconsistent output
- Common in budget strips
The difference?
Gold-bonded LEDs produce noticeably more light using the same power.
The Brightness You’re Missing
Real-world testing shows:
- Gold-bonded strips appear 20-30% brighter
- The difference is visible to naked eyes
- Performance gap widens over time
- Colors stay true without shifting
Imagine installing two kits side-by-side.
The gold-bonded strip makes the other look like it’s on dim mode.
The Long-Term View
Cheap bonding wires don’t just dim your initial brightness.
- They deteriorate faster, meaning your underglow fades month by month.
Six months later?
Budget strips look tired and inconsistent.
Quality strips still shine like new.
Your choice: save $20 now or enjoy brilliant underglow for years.
Single-Color vs RGB/RGBW Modes
RGB strips promise unlimited colors at your fingertips.
But here’s what you may not know: that versatility comes at a brightness cost.
Understanding the Technology
- Single-color strips: Every LED produces one color at full power. Simple, efficient, bright.
- RGB strips: Each LED contains three tiny chips (red, green, blue). Mix them for any color.
- RGBW strips: Add a dedicated white chip for better white tones.
Sounds great, right?
Here’s the catch.
The Brightness Reality
When RGB strips create “white” light:
- Red runs at ~30% power
- Green runs at ~50% power
- Blue runs at ~20% power
- Total output: significantly dimmer than pure white
Picture turning on three flashlights versus one powerful spotlight.
The spotlight wins every time.
Real Numbers That Matter
Lumen comparison for identical 5050 strips:
- Single-color white: 1000 lumens per meter
- RGB on white: 600-700 lumens per meter
- Single-color blue: 1000 lumens per meter
- RGB on blue: 300-400 lumens per meter
That’s 30-70% less brightness for the same power draw.
When Each Option Shines
Choose single-color when:
- Maximum brightness matters most
- You want one signature color
- Competing at shows
- Running ice blue, purple, or white
Choose RGB when:
- You love changing colors
- Matching paint schemes
- Creating light shows
- Brightness isn’t critical
The RGBW Compromise
- RGBW strips offer better white output than standard RGB.
- But they’re still 20-30% dimmer than dedicated single-color strips.
- Plus, that white chip sits idle when displaying colors. You’re paying for unused potential.
Making Your Decision
Ask yourself:
- Do I want the brightest possible glow in only one color?
- Or flexibility to match any mood?
There’s no wrong answer.
Just know what you’re trading off.
Driver Current and Control Electronics
That little control box included with your kit?
It’s not just for changing colors.
It determines whether your LEDs ever reach their full potential – and you can’t see inside to check.
The Hidden Performance Cap
Your LED strips might be rated for maximum brightness.
But here’s the truth:
- Cheap controllers often limit current to avoid overheating their components.
It’s like buying a sports car with a governed engine.
The capability exists, but you’ll never access it.
Good Controllers vs Budget Controllers
Quality controllers deliver:
- Full rated current to LEDs
- Stable output as battery voltage changes
- Smooth dimming without flicker
- Consistent brightness across effects
Budget controllers struggle with:
- Current limiting (50-70% of rated)
- Brightness drops when battery dips
- Visible flicker during fades
- Overheating during extended use
The frustrating part?
Both boxes look identical from outside.
The Telltale Signs
Since you can’t peek inside, watch for these clues:
Quality indicators:
- Controller stays cool after 30 minutes
- Brightness remains constant
- Smooth transitions between effects
- No flicker at low brightness
- Consistent performance hot or cold
Warning signs:
- Controller gets uncomfortably warm
- Visible dimming over time
- Choppy color transitions
- Flicker during strobes
- Different brightness between modes
The Battery Voltage Factor
Your bike’s voltage varies:
- 14.4V while riding
- 12.6V with engine off
Quality controllers compensate, maintaining brightness.
Cheap ones?
Your underglow dims and brightens with RPMs.
Making the Smart Choice
Look for controllers advertising:
- Amperage ratings (not just wattage)
- Voltage regulation features
- Thermal protection without limiting
- Known electronics brands
If a kit seems too cheap, the controller is where they cut costs.
Mounting Geometry & Reflectivity
You’ve invested in quality strips with perfect specs.
But mount them wrong?
You’ll waste half that brightness lighting up your exhaust pipes instead of the pavement.
The 120-Degree Challenge
LED strips emit light in a 120-degree spread.
That’s wide – too wide without smart positioning.
Mount strips flat against your frame?
Here’s what happens:
- 40% lights the ground (good)
- 30% shoots sideways (wasted)
- 30% hits your bike’s underside (useless)
That premium kit suddenly performs like a budget option.
Strategic Mounting Positions
For motorcycles:
- Angle strips 45 degrees downward
- Mount inside frame rails when possible
- Position behind lower fairings
- Keep strips 6-10 inches from ground
For cars:
- Tuck strips into rocker panel lips
- Use pinch welds as mounting points
- Angle toward center of vehicle
- Maintain 4-8 inches ground clearance
The Reflection Multiplier
Smart riders use their bike’s underside as a reflector:
- Clean, painted surfaces bounce light down
- Chrome or polished parts amplify the glow
- Light-colored undersides work best
- Even white spray paint helps
Creating the Pool Effect
The goal isn’t seeing the strips themselves.
It’s creating that ethereal pool of light beneath your ride.
Best practices:
- Hide strips from direct view
- Let light bounce before hitting pavement
- Create depth with multiple strips
- Avoid straight-line mounting
Common Mounting Mistakes
Avoid these brightness killers:
- Strips visible from standing height
- Mounting too close to tires (spray blocks light)
- Placing strips where exhaust heat hits
- Using black zip ties (creates dark spots)
The Final Test
After mounting, check from 20 feet away.
Can you see individual LEDs?
Reposition them.
See only a smooth glow? Perfect.
Remember:
- Professional underglow looks like your bike floats on light.
Ready to Light Up the Night
Now you know what separates professional-grade underglow from disappointing dim strips.
It’s not just one factor – it’s how LED chip type, density, power delivery, and mounting work together.
Remember: buy once, glow bright for years. Your ride deserves underglow that actually shows up on the street.